
Art Lesson w/ Ms. Jennifer: Hokusai

Watch this short video about Hokusai before we begin.
About the Artist:
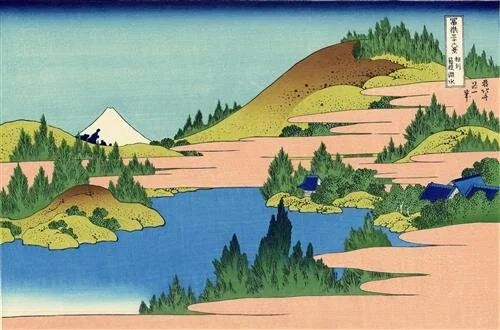
Tour of the Waterfalls of the Provinces is a series of landscape woodblock prints by the Japanese ukiyo-e artist Katsushika Hokusai. Completed c. 1833–34 and containing eight prints, it was the first ukiyo-e series to approach the theme of falling water and was famous as a new way of showing nature. The waterfalls take up most of each page, while any human figures appear small on the page. Hokusai loved nature and wild places and believed water was a powerful force in our lives. You can learn even more about the artist on this website: https://www.katsushikahokusai.org/


Let’s make a print series like Hokusai, focused on a body of water special to you. We will use pieces of styrofoam tray or plates to make our “printing block”, while Hokusai used woodblocks for his work. We can use many colors of ink on our one block, while the Japanese artists of the time carved a separate block for each color.
Materials:
A photo of a waterfall, ocean, or lake. Or use this drawing guide
Styrofoam container or plate, cut out a flat circle, square, or rectangle as large as possible. This will be your printing plate, which you will carve.
Pencil
Copy paper (several sheets)
Tape and scissors
Scratch-art tool, orange stick, old ballpoint pen, or cheap thin plastic paintbrush handle - this is to carve your plate
Water-based (washable) markers
Clean sponge, rag, or spray bottle
water
Instructions:
After studying the art of Hokusai, come up with a drawing of a waterfall, wave, or lake. Use a piece of paper the same exact size of your styrofoam “plate.” You can trace it onto the paper or cut the paper to size. Make a few sketches if needed until you get a simple line drawing that you like. Your lines will appear white on the finished print, and the part that is blank on your drawing will be filled with color on the print.
Tape the drawing to a window or use a lightbox to trace the drawing onto the back of the paper. This is because the printing plate needs to be a mirror image of your drawing.
Now, tape the “back” side of the drawing to the top of your printing plate.
Begin to trace the drawing, pressing hard, to transfer the image into the plate. Peel up a corner to see how the image is looking.
Trace the entire drawing. Peel the paper off carefully to check that it has transferred.
Trace the drawing into the plate more deeply by using the scratch art stick or another object.
Ink your plate: Cover the raised surface of the plate with markers.
Wet some clean paper slightly by pressing a wrung-out sponge or rag, or spritz lightly with water.
Press the inked plate onto the paper and give it a good “backrub” over the entire back of the plate.
Carefully peel back the plate from the paper and admire your print!
You can re-ink your plate to start another print, and make a series of prints using either the same color scheme or change it up each time.
Doodlebugs:
Have your toddler or preschooler draw directly onto a piece of foil or styrofoam with water-based markers. Name each color as they draw. Dampen copy paper, press it onto the drawing. Have the child give the plate a backrub to transfer the image onto the paper. Carefully peel back the paper to reveal their print.
Don’t forget to share your artwork with Jennfier@BlowingRockMuseum.org You can also enter your art into the Watauga Library Youth Art Contest for ages 1-17 now through September 25th, to win prizes from Cheap Joe’s Art Stuff!


Have you subscribed to our YouTube channel? Click on the green subscribe button.
And if you find value in our mission to bring art enrichment to community students through programs such as Young at Art, please consider supporting BRAHM by donating or joining as a member.