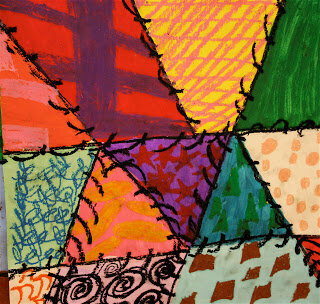
Art Lesson w/ Ms. Jennifer: Faith Ringgold
Let’s express ourselves by making a Faith Ringgold inspired paper quilt work of art.
About the Artist:
Born Oct 8, 1930, Faith Ringgold is a painter, writer, mixed media sculptor and performance artist, best known for her narrative quilts. She was the youngest of three children, and her parents were artists who incorporated creativity into every day family life. Ringgold grew up in New York City’s Harlem, and while still in high school she decided to be an artist. She attended City College of New York, where she received a degree in fine arts and education (1955) and an M.A. in fine arts (1959). In the 1980s Ringgold began working on “story quilts,” which became some of her most renowned works. She painted these quilts with narrative images and original stories set in the context of African American history.
Here is Ms. Ringgold reading her famous book “Tar Beach,” based on her story quilt of the same name:
Watch Ms. Jennifer create her paper quilt collage here:
Materials
Scraps of paper from old artwork, magazines, catalogs, or newspapers.
Scissors
White Glue and an old brush, or glue stick
Stiff paper or cereal box for your background, cut in a square shape like a quilt block
Black sharpie, oil pastel, or crayon
Instructions
Sketch a design on your background square paper or cardboard.
Begin cutting out scraps of colorful papers to collage.
Work carefully to make sure you cover all space with papers.
Glue pieces down flat, using either a glue stick or white glue (pour a little puddle into a lid or piece of foil) and an old paintbrush.
Allow glue to dry
Once the work is dry, go over outlines or add story text with your black sharpie or crayon to make it look like sewn stitches.
For Doodlebugs Ages 2-5:
Materials:
Paper scraps and one sheet for the background
Either glue stick or small amount of white glue and an old brush
Markers or crayons
Instructions:
Using the same process as above, allow the child to experiment with placing the paper scraps over one another. As they handle each piece, talk about the shape, color, size, and placement, using words such as under, over, straight, curved, large, small, etc.
You can encourage early cutting skill development by pre-cutting 1” wide strips of paper, then allowing the child to cut small pieces from the strips. Hint: magazines and newsprint are sometimes difficult to cut for a small child. You might start with construction or printer paper.
You did it! Don’t forget to email your work to Jennifer@BlowingRockMuseum.org
Have you subscribed to our YouTube channel? Click on the green subscribe button.
And if you find value in our mission to bring art enrichment to community students through programs such as Young at Art, please consider supporting BRAHM by donating or joining as a member.


